

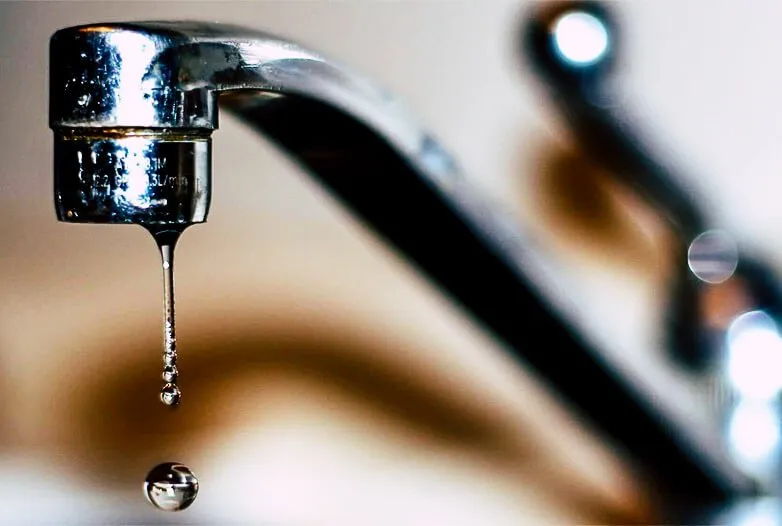

To change a tap washer, first turn off the water at the mains and open the tap all the way. Then take off the handle, the chrome skirt and the headworks so you can pull out the jumper valve. Fit a new washer that’s an exact match in size, check the brass seat for wear or damage, and put everything back together in reverse order before slowly turning the water back on. The whole job usually takes around 20–30 minutes.
In general, a dripping tap is down to a worn-out washer, and on a traditional Australian tap it’s one of the very few plumbing fixes you’re allowed to do yourself. Over the years I’ve replaced thousands of these washers around Canberra and Queanbeyan, so this guide covers the bits many DIY articles leave out, like how to tell whether your tap actually has a washer, the one mistake that can turn a $5 fix into a cracked pipe in the wall, and when a new washer simply won’t solve the problem.
Key takeaways
- Only compression taps have washers. If you’ve got a single lever mixer, or a tap that stops dead after a quarter turn, you’re dealing with a cartridge instead.
- Always brace the tap body with your free hand while undoing the headworks, otherwise you risk twisting the fitting behind the wall.
- Take the old washer with you to the shop. Most indoor taps use a 12mm or 13mm washer, although sizes can vary.
- If the drip comes back within a few weeks, the seat is probably damaged and another washer won’t fix it.
- In the ACT you can usually fit a new washer yourself, but replacing a whole tap, a cartridge or any pipework needs a licensed plumber.
First: does your tap actually have a washer?
Most Australian homes have some mix of three tap types. Only one of them uses a rubber washer, and that’s the compression tap (you’ll also hear washer tap or jumper valve tap). Quarter-turn and mixer taps seal with a ceramic cartridge instead. Buy a washer for one of those and it’s a wasted trip to Bunnings.
The quickest way to tell is to turn the handle. If it goes round a few times and gets stiffer as it closes, you’ve got a washer tap. If it stops hard after a quarter turn, or it’s a single lever, it’s a cartridge.
If you’ve searched “how to change a washer on a mixer tap”, you’ll find there’s no washer to change at all. To fix a leaky mixer tap you need to replace the ceramic cartridge, and because that seal sits under pressure from the mains supply, in the ACT you’ll need a licensed plumber to do it. For more on how we repair mixer taps and quarter-turn cartridges, see our leaking taps Canberra service.
Inside a tap: the parts you’re working with
Knowing the parts makes the repair a lot simpler and takes the confusion out of shopping at the local hardware store. The diagram below shows a standard Australian compression tap, broken down in the same order you’ll take it apart.
Tools and parts you’ll need
You should be able to get every part listed below for under $15 at most hardware stores. If you have a few taps that need doing, a tap washer service kit, which includes washers, jumper valves, O-rings and body washers in one pack, will likely give you the best value.
| Item | What it’s for | Plumber’s note |
|---|---|---|
| Adjustable spanner or tap spanner | Undoing the headworks | Wrap the jaws in tape to save the chrome. |
| Flat and Phillips screwdrivers | Index button and handle screw | A small flat blade pops the button without scratching. |
| Needle-nose pliers | Pulling out the jumper valve | Some jumpers are stuck in with scale. |
| Replacement washer / jumper valve | The fix itself | Match the old one. Indoor taps are usually 12mm or 13mm. |
| O-rings and body washer | Stops leaks around the handle | Replace them while it’s apart. They’re cents each. |
| Silicone tap grease | Smooth handle, longer O-ring life | Use silicone grease, not Vaseline, which can swell rubber seals. |
| Towel and a torch | Catching small parts, seeing the seat | Put the plug in. Every plumber has lost a screw down a drain. |
Don’t guess the size. Pull the tap apart first, then take the old jumper valve to the shop and match it in your hand. A lot of the “my new washer didn’t work” calls we get turn out to be the wrong size. Put a 12mm washer in a tap that needs 15mm and it will never seal.
How to change a tap washer, step by step
These steps cover a standard compression tap on a basin, laundry tub, bath, shower or garden tap. The job is the same on all of them. Shower and bath taps just sit further back in the wall.
-
Turn off the water at the mains
Find your main stop tap. In most Canberra homes it’s next to the water meter near the front boundary. Turn it clockwise until it won’t go any further. Then open a tap at the lowest point of the house to let the pressure out.
In some cases your basin or kitchen taps will have their own isolation valves, which you’ll find under the sink. If you find these, you can use them instead of the main stop tap, and the rest of the household can keep using water while you work.
-
Open the tap and protect the basin
Once you’ve opened the tap you’re fixing all the way and the water has stopped flowing, put the plug in the drain and lay a towel in the bottom of the basin. That way any small pieces that fall off land on the towel instead of being lost down the drain.
-
Remove the handle
Using a small flat screwdriver, flick off the red or blue index button and then undo the screw underneath. Carefully lift the handle straight up. If it’s stuck on the splines, wiggle it gently from side to side, but don’t lever it off, as that will dent the chrome finish.
-
Unscrew the skirt (shroud)
Unscrew the chrome skirt anticlockwise by hand, and wrap a rag around it if you need extra grip. If scale build-up has locked it on, a strap wrench will loosen it without marking the finish of your tap.
-
Undo the headworks, and brace the tap
Fit your spanner onto the brass hex nut and turn it anticlockwise. While you do this, hold the body of the tap or the spout firmly with your other hand. This stops twisting forces reaching the fitting behind the wall or under the bench. Once it’s loose, unscrew the headworks by hand and lift it out.
⚠ Stop here if it won’t budge. Old brass headworks can become seized solid over time, and applying too much force can crack the fitting inside the wall, turning a $5 washer job into a costly repair. If steady, firm pressure doesn’t shift it, contact a plumber.
-
Replace the washer (or the whole jumper valve)
The jumper valve either sits loosely in the body of the tap or comes out when you remove the headworks, so use pliers to pull it out if you need to. You can remove the old washer and fit a new one on the end of the jumper, but replacing the entire jumper valve gives a better seal and is quicker, and it only costs a couple of dollars.
-
Check the seat (most guides skip this)
Use a torch to light up the inside of the tap body and run your finger around the brass seat, which should feel smooth and even. If you can feel grooves, pits or an uneven edge, the seat is damaged, and a new washer will start leaking again within weeks. Clean out any debris while you’re there.
-
Service, reassemble and test
Install new spindle O-rings and a new body washer, and add a light smear of silicone tap grease to the thread on the spindle. Refit the headworks hand-tight and then nip it up with your spanner, being careful not to over-tighten. Close the tap, replace the skirt and handle, then gradually open the mains and check for drips at the spout and around the handle.
During the colder months people often turn their taps off harder, and the cold makes washers go hard so they lose their grip on the seat. Both wear washers out quickly, especially on outside taps. Your new washer only needs a gentle close to seal properly, so if you find yourself leaning on the handle to stop a drip, something has worn out.
Rather not pull your taps apart?
We fix leaking taps across Canberra every week, from washers and seats through to cartridges and mixers, and most jobs are sorted in a single visit.
Still dripping after a new washer? Troubleshooting
Where the leak is coming from will tell you where the issue lies. The chart below helps you work out whether this is a DIY fix or one better left to a professional plumber.
Why a damaged seat causes repeat drips
Over time, the brass seat develops small grooves and scratches from the force of high-pressure water and the grit that passes through the system. This lets water keep flowing even when a new rubber washer is pressed against those small openings. A plumber uses a reseating tool to remove the damage and smooth the surface of the seat. Typically, if there is significant damage or corrosion to the tap, it’s more practical to simply install a replacement.
5 tap washer mistakes plumbers see all the time
- Not turning off the mains. If you undo the headworks while the water is still on, you’ll end up with a fountain at full mains pressure.
- Not bracing the tap. Twisting the tap body can crack the fitting behind the wall, and it’s the most expensive DIY tap mistake we get called out to fix.
- Using the wrong washer size. Washers come in a few sizes and close isn’t good enough, so always match the new one to the old one.
- Over-tightening. Cranking down on the headworks or the handle squashes the new washer and wears the seat, when firm is all it needs.
- Ignoring the seat. If the seat is chewed out, you’ll probably be doing the whole job again within a month.
We get a lot of calls about dripping taps where the homeowner has already changed the rubber washer at least twice before contacting us. In about nine out of ten of these cases, the brass seat is badly worn. After re-cutting the seat and fitting a new jumper valve, we can usually stop the drip for years. If you’ve previously replaced the washer and the drip has come back, it’s generally not worth attempting it again.
Is it legal to change your own tap washer in the ACT and NSW?
Yes, normally. Fitting new rubber washers, jumper valves and O-rings inside an existing compression tap is generally classed as homeowner maintenance in almost all areas of Australia, including the ACT and NSW. Any other plumbing work needs a licensed plumber.
| Job | DIY OK? | Why |
|---|---|---|
| Replace a tap washer or jumper valve | ✅ Generally yes | Maintenance inside an existing fitting |
| Replace spindle O-rings / body washer | ✅ Generally yes | Same as above |
| Replace a mixer or quarter-turn cartridge | ⚠️ Licensed plumber | Tapware component work |
| Replace a whole tap or mixer | ❌ Licensed plumber | Connection to the water supply |
| Anything involving pipes, flexi hoses or walls | ❌ Licensed plumber | Regulated plumbing work |
If you do plumbing work without the right licence you could face fines. It could also cause problems with your home insurance if something goes wrong. To check that you’re hiring a licensed plumber, look them up on the Access Canberra public register. Each licensed plumber operating in the ACT is required to include their licence number in all advertising material, and ours is 20181262.
This is general information, not legal advice. If you’re not sure, check with Access Canberra or NSW Fair Trading.
How much water does a dripping tap waste?
More than you’d think. According to Sydney Water, a single dripping tap wastes anywhere from 27 to 198 litres per day, and at one drip per second a tap loses approximately 7,000 litres a year. Every one of those litres is reflected on your water bill.
When to call a plumber instead
Replacing an old washer is normally a simple DIY task. However, if any of the following situations apply, it’s worth calling a licensed plumber.
- You have a mixer tap or quarter-turn tap, which uses a cartridge rather than a washer
- The headworks won’t move even with firm, steady force
- A new washer has gone in but the tap keeps dripping, which points to a damaged seat
- You’ve spotted water under the sink, behind the tiles or inside a wall
- The tap body is corroded, cracked or loose from the bench or wall
- You have several old taps and would like them all repaired in one visit
At times, repairing a tap doesn’t make financial sense. If your taps are decades old, the seats are worn and replacement parts are hard to find, it may be more cost-effective to replace the taps than to keep rebuilding individual components. Ceramic disc tapware rarely gives trouble and is easy to service. We’ll give you our honest assessment based on what we see, and you’re always welcome to supply your own tapware.
Dripping tap in Canberra?
We’re licensed, local and upfront, and Ethan looks after Canberra, Belconnen, Tuggeranong, Queanbeyan and the surrounding areas for tap repairs and replacements.
Tap washer FAQs
Can I legally change a tap washer myself in Canberra?
Generally, yes. In the ACT, changing the washer, jumper valve or O-rings inside an existing compression tap is treated as homeowner maintenance. Once you get into replacing a whole tap, a mixer cartridge or any pipework, though, it becomes plumbing work that needs a licensed plumber.
What size tap washer do I need?
Most indoor household taps in Australia take a 12mm or 13mm washer, while bigger taps and some garden taps use 15mm or more. The easiest way to get it right is to take the old washer or jumper valve along to the hardware store and match it there.
How do I change the washer on a mixer tap?
You can’t, because mixer taps don’t actually have a washer. Single lever mixers rely on a ceramic cartridge, so a dripping mixer usually needs a new cartridge, and in the ACT that’s a job for a licensed plumber.
Why is my tap still dripping after I changed the washer?
In most cases it’s a damaged tap seat. When grooves wear into the brass, the new washer can’t seal properly, so the seat either needs re-cutting with a reseating tool or the tap needs replacing. It’s also worth double checking that you used the right size washer.
How do I change a shower tap washer?
It’s the same process as a basin tap, but because shower taps sit deeper in the wall you might need a deep tap socket to reach the headworks. Keep the tap braced and never force a seized headworks, as a cracked fitting behind the tiles makes for an expensive repair.
Can I change a tap washer without turning off the water?
No. As soon as the headworks comes out there’s nothing holding back the mains pressure, so turn off the mains, or the tap’s isolation valve if it has one, before you start.
How long does a tap washer last?
In most cases several years, although hot water, heavy use and over-tightening will all shorten its life. If you find yourself replacing the same washer every few months, the seat is most likely damaged.
How much does it cost to change a tap washer?
Doing it yourself costs less than $15 in parts. What a plumber charges will depend on how many taps need doing and whether the seat needs re-cutting, and getting several taps done in the one visit is usually the most cost-effective option.
- Sydney Water: Water use and conservation (dripping tap and bath figures)
- Access Canberra (ACT plumber licensing and public register)
- Born Plumbing on-site experience, Canberra and Queanbeyan